Wednesday, 31 August 2011

Berg paper dress complete

So here it is, what you've all been waiting for, the finished dress.
Next some of the detail

 Noa came to pick the dress up after I had finished my violin teaching on the bank holiday Monday (there really is no rest for the wicked!) we took it off my dress form Margo and carfully transferred it into the back of Noas car, ready for its journey to Berg, where it will hopefully be modelled and used to promote their fantastic fashion library (as you can see below Jam has his own ideas of a suitable modeling for it...). After it had gone I decided a large glass of red wine was called for before I put the finishing touches to Emma's Jane Austen inspired frock.  


Thursday, 25 August 2011

Paper dress Inspiration & Making

 
After looking at all the dresses that had been made previously I decided to change some elements while keeping some of the things that worked well and keeping the feel of the original dress that started all this off. Once I'd picked up the materials, my ideas on the design were also influenced by them. One of the first things to catch my eye was two books of Japanese translations. One was quite a minimalist font whereas the other used more bold characters. In each case however because of the chartacters the paper had a softer look. On comparison with some of the other books the paoer itself appeared also less white tending to wander into pinky/dusty tones. I thought this would be fantastic for the bodice but wasn't sure it would be strong enough on its own. Plus as the dress is intended to be worn what would the comfort be like? The soloution to this came from good old newspaper paper mache. Using a fabric offcuts of a silver gown I'd previously made pinned onto Margo (my dress form) as a base and marker of where the bodice should fit to it was possible to sculpt a paper mache base (this part took quite some time to complete as I had to experiment with different glue strengths as trying to get the news paper and fabric to bond was a bit tough). Once that had dried the japanese paper could be applied to the top and when this was complete I experiemented with other original details (like lacing at the back of the dress, a shoulder strap and oriental lillies made out of paper and beads) could be added. The skirt presented yet more challenges. First of all in regard to length (I had originally envisioned a to the floor skirt with a 1800 type shape (like a slim bell really) in monotone with a split down the back, so colour pages could come flooding out) having shown this idea to Berg we decided on a shorter length because it had to be worn and transported. Also the addition of the multicoloured flowers/shoulder detail on the bodice meant that for the gown to flow colour had to be injected into the skirt at regular intervals. The next challenge was movement; quite a few of the designs that I had seen seemed to favour a fixed/static skirt.

 Anyone who has ever knocked a pile of paper over (I'm thinking most of you) would know that paper is anything but static, I wanted my dress to move, but the pages had to attach to each other somehow... it was only when I was out at a garden centre that the idea hit me. We were looking at some beautiful (and being fully grown, expensive) Koi Carp and in particular how their scales lock into each other, being fixed but allowing the fish to move freely. Could the idea of that be translated into my dress?
With the fish scales idea firmly planted in my mind I decided to start expeimenting with my skirt, making 'scales' of paper that were uniform, but different patterns and attaching only the top corner of these so that their movement would be retained. The story book dress on the previous post features sewn pages, after a trial of how that worked (it did until you applied some serious weight) and calculating how long it would take it I decided that a glue gun would probably provide a better solution. So after sourcing a variety of different books/colours and cutting all the pages to size, graduating them slightly as they went down the skirt I starting the constuction at the bottom. Within 20 squares/1 hour (which was about half a side) I had burned myself quite badly on a finger on my left hand (and this was supposed to be a special safer glue gun!). As I was teaching violin at a band workshop at Towersey music festival (for which fingers would be a distinct advantage), it was decided that no more glueing should take place in case I burnt myself again, so Jam being manly and heroic stepped into the breech, and for quite a few evenings we sat in my makeshift studio at the back of the house, me picking the squares and showing where they should go, Jam doing the glueing. Now it's nearly finished and I will unveil on Monday :-)

Sunday, 14 August 2011

Researching paper dresses

A few weeks ago I was browsing Twitter during a break at work when this dress caught my eyeIt had been posted on a tumblr site by someone who worked at Berg publishers and they had republished the link. Awesome I thought, the next thing I know they were asking if anyone would be willing to create such an item and before I knew what was happening I was volunteering (c'mon it is not everyday a awesome publisher offers up this kind of opportunity.
As ever when starting a new piece of design it's important to look at what has gone before, so here they are a selection of the paper dresses that have been made before, please do let me know what you think of them in the comments. This dress was made out of children's books, I completely love it, not only has it got an amazing shape but the materials have been used in a really ingenious way and you kind retain that sense of childlike wonder/what the material was before it became a dress. Fantastic! Below is the dress before it was put together, they laid out all the book covers and then stitched them together using sparkly nylon thread. Also the bodice was made out of the bindings of the books. There are loads more photos and information on this one on the designers site here. Definitely worth a look. Kind of following on in the fairytale stakes we have this dress here which I have nicknamed the big book dress. I like the way that the pages appear to have fallen at the bottom of the dress but I think that this maybe doesn't work as well as the previous dress (it was designed by a bridal designer whose blog post about the dress can be found her
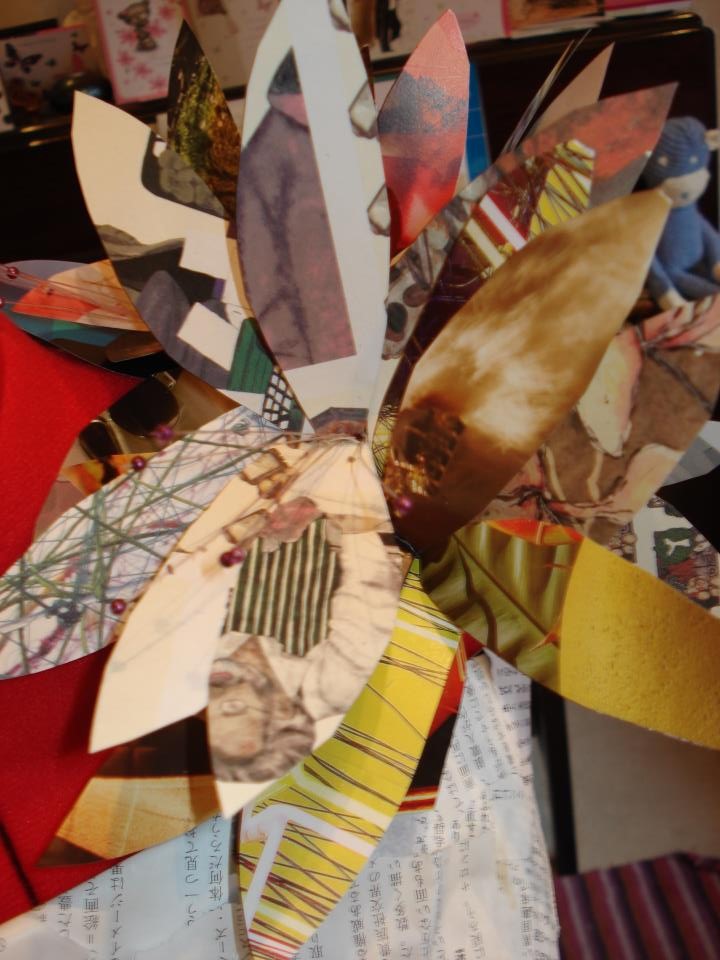
e. The next couple of dresses are for me more about different forms within the paper dress, the first one plays about with ideas of paper, nature, leaves and flowers whereas the next uses the texture of pleated newsprint text for its main feature. My favourite out of these experimental form dresses is this one which uses light paper to create air like waves in the main bodice of the dress. Fantastic and I love it ( I would completely wear this one out although I think it maybe looses something by not showing it's origins proudly. On the other end of the scale I found this dress (actually I think dress is probably the wrong word but its definitely intended to look like a dress). Anyway that's my round up of some dresses that have been created previously. Berg have very kindly offered me use of their fashion archive so at the moment I'm going through the materials and seeing what kind of designs appeal and will work with those materials. If all this dress chatter has made you hungry for more I found this great how to for a newspaper dress. Perfect for a fancy dress party I would have thought (unless of course it rains :-)


Hitting the snow

Yesterday courtesy of my awesome boyfriend me and my snowboarding jacket (the humbug) hit the real (but purposefully generated) snow at Milton Keynes. I'd wanted to go snowboarding for ages, although I get cold really easily I've always loved snow and after attending the freeze festival (blog post here) and seeing some of the best snowboarders in the world fly (there really is no Linkother way to describe it) I definitely wanted a go. I had a holiday booked but due to my house nearly falling down (hot water cylinder & fuse box I'm looking at you here) I hadn't been able to go. Jam's birthday present was a total surprise and when he told me what we were doing on Friday night I had a mixture of feelings going on. I was really excited to try it but I do tend to be one of those people who has to work at stuff to get good, so I was a bit worried I'd be holiding Jam up (as he has done it before). Turns out I needn't have worried, it was easy to get my balance on the board (all that teenage skating did have a purpose) and it was really natural to control the board. I had a jacket and trousers from the trip that didn't happen but all the hire for the bindings, board and instruction were included in the price of the lesson (including my awesome board, purple with a little cat freaking out on it, erm have we met?). Before I could really get nervous we were at the top of the slope. Instructor Nick showed us the basics of getting in and out of our bindings and explained how the snowboard works (you need to bend your knees to go anywhere and just keep your weight over the board) with that he asked us to try and get down the slope backwards (it's easier than going forwards apparently but obv you can't see where you are going). One of my major worries was that I wouldn't be strong enough to handle the board but I actually found by just relaxing the board went by itself (although I could do with a bit more leg muscle to turn the board over at the top of the slope). The feeling when you are moving though was really magical, I can see why people get hooked, Nick taught us how to refine our balance and also how to go left and right (you basically just look where you want to go, your body does the rest, which is why looking at the snow is bad). At the end of the session we were given our progress sheets and I'm pleased to say I passed level 1 9just like Jam) so we can now progress to beginners 2! Wooo! We were completely wiped after only an hour (its all the getting up the hill and in and out of bindings I think that does it the actual snowboarding was a breeze) so headed off for some tasty Mexican which definitely restored energy levels. I'm hoping Jam and I can work through the grades together and maybe I can hit foreign slopes with him some time? At the moment I'm still really buzzing from the whole experience, bring on level 2! (next challenge get as good as these girls

Another awesome video here:

Saturday, 13 August 2011

birthday presents

So today was my birthday and as well as being lucky enough to be taken to the Red House this is what else I received (lovely presents). This scarf was from my mum, you can't see it on the photo but the edges of the cotton are actually raw. I wore it to Red House but I think I'm going to have to be pretty careful with it ot
herwise it might just end up as a pile of cotton...
 The lamp was from my surrogate mum Trisha, fantastic taste as usual.
 he chest of drawers is from Jam's mum, to keep all my bits and pieces in, from his dad and Kate I got the book to accomapany the exhibition that we went to see a couple of weks ago The Cult of Beauty.
 The birdhouses were from my friends Stacey and Maddie/Jonny. I was originally hoping to put them outside, but witchcat is going through a bit of a bird catching phase at the mo, so I bought these little birds to go in them instead and will hang them inside.

Last but by no means least my brother bought me this beautiful fossil box, perfect for keeping treasures in.

Thursday, 11 August 2011

The Red House - a special birthday treat


So as today was my birthday (happy birthday to me) myself and his Jammyness took the day off in order to explore a house that I have been dreaming of for a while. It was at universty that I first found myself drawn to the Pre Raphaelites, we looked at the literature of the movement for a week in Victorian Lit, but that was enough, I was hooked. Doing some internet reseach I stumbled across some fabric designs by William Morris, their natural forms and the beauty of the designs struck me immediately and after researching him his whole ethos really appealed to me, A dissertation about the Pre Raphaelites followed and its since become a bit of a life long obsession. So we went, and this is what we saw... So as today was my birthday (happy birthday to me) myself and his Jammyness took the day off in order to explore a house that I have been dreaming of for a while. It was at universty that I first found myself drawn to the Pre Raphaelites, we looked at the literature of the movement for a week in Victorian Lit, but that was enough, I was hooked. Doing some internet reseach I stumbled across some fabric designs by William Morris, their natural forms and the beauty of the designs struck me immediately and after researching him his whole ethos really appealed to me, A dissertation about the Pre Raphaelites followed and its since become a bit of a life long obsession. So we went, and this is what we saw...


 A very Happy Birthday indeed :-)


Friday, 5 August 2011

Nuptual bunnies

I can finally post photos of these as my friend Vikki's wedding is over and these were a complete surprise for her. I got approached by Vikki's mum with these two blank bunnies with the challenge to make them into a bride and groom. I chose who was who based on the ears, I thought the one with the ears closest together should be the boy (cause I could put his ears in a top hat) and the other with the ears apart was perfect for the bride. I had loads of material remenants left over from Lisa's wedding dress so used one of those for the bride bunnies dress. The boy bunny was dressed mostly in felt (which was great - so much less hemming). I'd done another small commission for the wedding (adding touches to the shoes for the bridesmaids) so I knew the colours were purple and silver hence the added splashes of colour. Hope she liked them :-)

LinkWithin

Related Posts Plugin for WordPress, Blogger...